


Paris Rhome to Bosch, Alternator Experience
Recently at one or our monthly Tuesday evening pizza-fests, I was asked how the alternator conversion went and how the shark was now going
... my reply?
Well I've never been happier!
Not only did my problem alternator 'fuzzies' go away but two other problems on the list disappeared. The intermittent car alarm and driver's console fixed also. One big benefit was the headlights are now really BRIGHT!
Wow! My neighbour complained about me having high beam on when I came home at night, straight into his bedroom. - so at least someone not directly involved noticed a big difference too.
OK. The low-down: Its approximately $1800 retail for a Rhome Alternator (90A, 14V). I found that you can use a Bosch Model
BXH1333BB (100A, 14V) with much the same charge/regulation curve as the Rhome model except at the low end, i.e. at the 800 rpm mark. Bosch really only
starts pushing the power out above 950 rpm.
My professional auto-electrician friend did all the work over the next three days; We 'farted around' trying different
settings until we got it perfect: Bob Hudson 0415-969-308 was the professional, I was just and still am just the tea boy.
Bob has offered to either come out to you or you can go to him. The approx parts price is $350-$400 (shim, spacers, replacement
engine belt, bolts, additional wiring and of course the BXH1333 (BXH1333BB) naturally aspirated alternator. Bob charges are $85/hr labour
+ $60/hr (one way to site only) all timed in 15 minutes segments. Estimated labour 7 to 8 hours, dependent on the conditions for mounting as
not all 928's may have the same mount parameters - we don't know yet.
If you want him to come to you you will have to provide a flat cement surface to jack up and secure your Shark, additional 2-3
meters area around the shark to get at it, 240vac for the tools, and close parking for his vehicle for tool and mounting/testing equipment. He will
certainly do a good deal for 928 owners - he loves driving 928's over 911's any day - so that puts him in my good book to start with.
Also you may be interested to know that Bob Whyms was very impressed with the unit when I took my beast into him for its yearly
10K klm service.
Apart from being cheaper than the original part, the Bosch alternator, sits well, outputs a perfect charge to the battery
and boosts the voltage the engine has been lacking for years (13.2 to 13.6v)
Images of the Alternator change over.
The following set of images represent the steps taken to change over from the Rhome to the Bosch Alternator
|
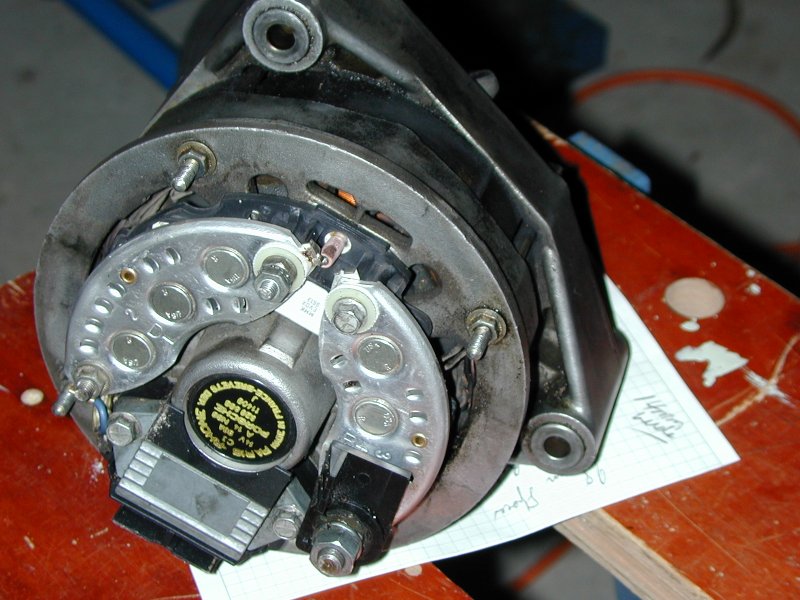
288 Picture of the rear end of the Paris Rhome (made in France) Porsche 14VDC 90Amp (P/N 92880311401J) standard alternator in most if not all 928
vehicles. The Paris Rhome Alternator is very unreliable in that usually the diode pack (seen here as the bright silver section It was just replace
after the last one went faulty 18 months prior to the complete swap out). Each diode pack has heavy copper tracks between isolating material. It is
not uncommon for these tracks to become open circuit. At the bottom of the alternator is its voltage & current regulator and appended coils brushes. |
 |
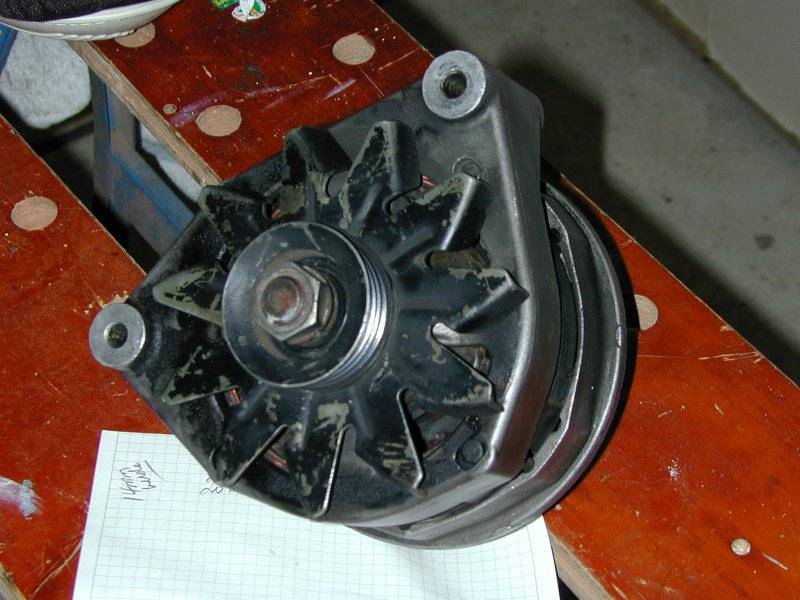
289 Front view of the Paris Rhome Alternator. Nothing surprising except the
fan assembly right angled arms which are not that effective. Hence the alternator is supplied by force air via the front right hand air duct. |
 |
290 Rear view picture of the Bosch BXH1333 (BXH1333BB) Alternator KCA 14VDC 100Amps as used on Holden Commodore VS/VT naturally aspirated alternator. On the bottom I have taken off the Voltage and Current regulator so you can see the field windings and the clean and effective (2 screws) mounting. Especially important over time when you'll have to replace the regulator when the brushes are worn. |
 |
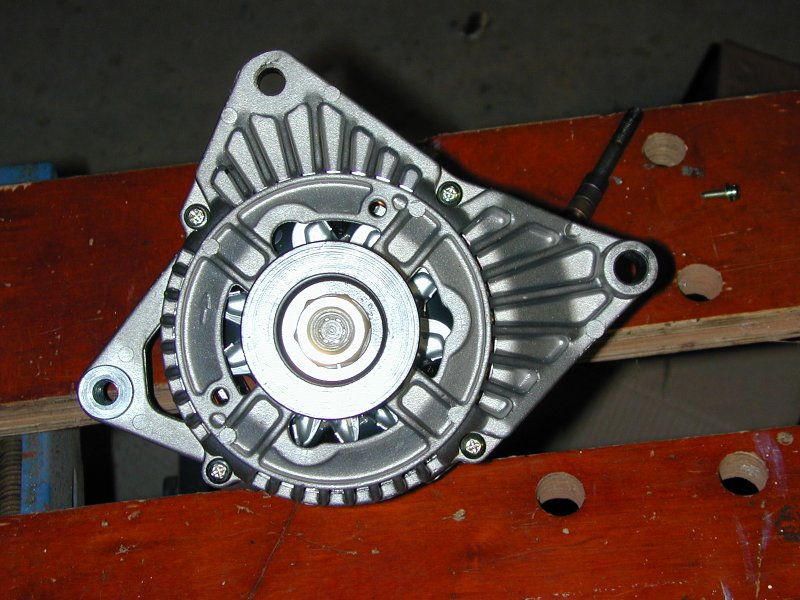
291 Front view of the Bosch BXH1333 Alternator. |
 |
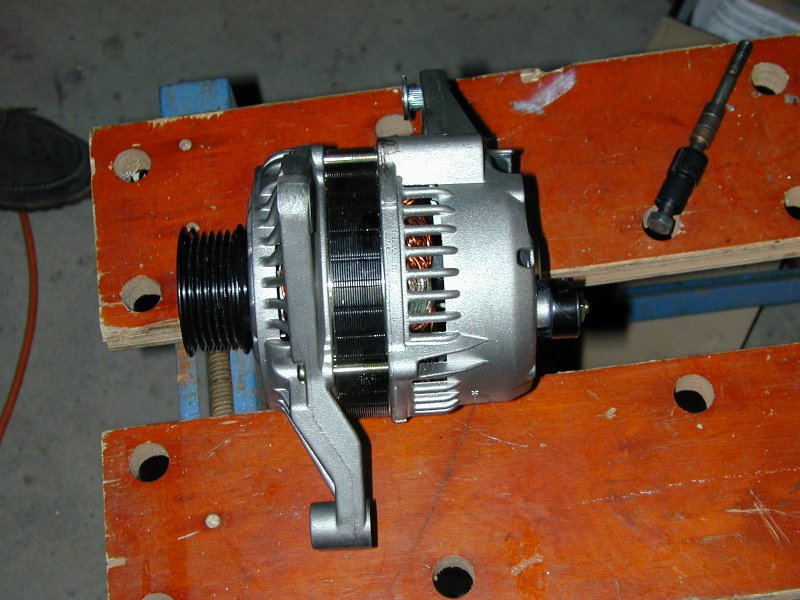
292 Side view of the Bosch BXH1333 Alternator. Note the arm at the lower
section. This has to be rotated 90 degrees (to be able to fit into the 928 compartment).
You simply take out the four main assembly retaining bolts,
rotate one half 90 degrees clockwise, and reassemble. You'' know if your done so in the wrong
direction because you'll be trying to bolt the alternator into thin air, other than into the
original bolt setting. |
 |
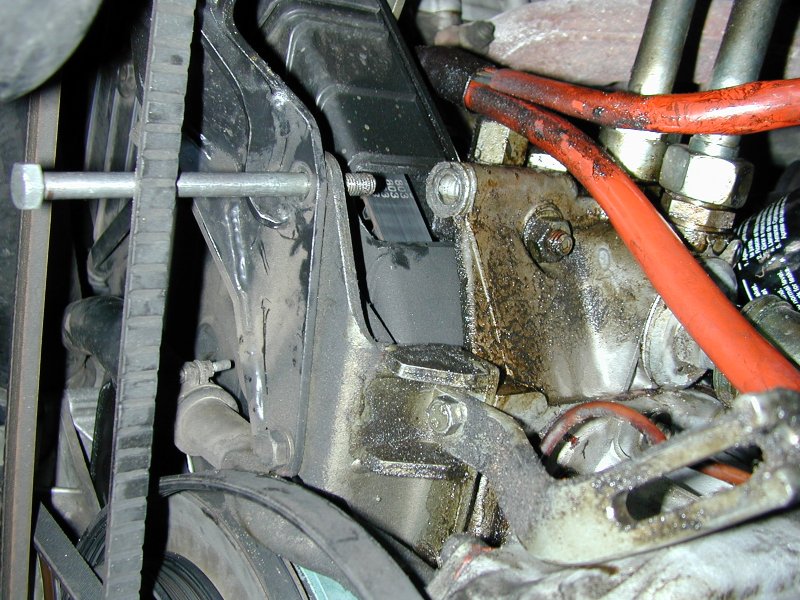
293 That bolt setting as alluded too in picture 292. Notice you haven't much
room between the engine itself, the pulleys and belts. So, take care. |
 |
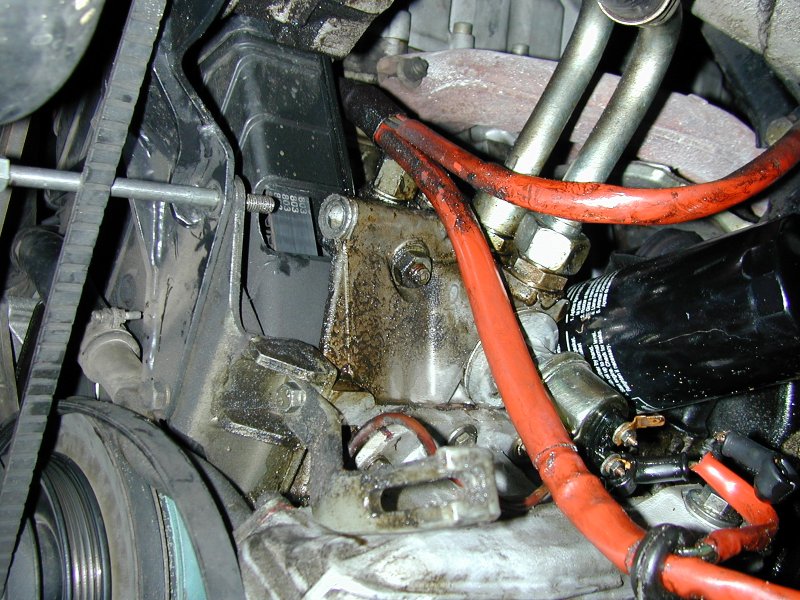
294 Just a slightly different view point of where your going to have to mount the alternator
finally. |
 |
300 A special assembly of hollow rod, new bolt and washers are required to fit the
Bosch alternator. I don't have all the details on the final bolt, shims, rod, or washers used. You will have to contact Bob Hudson on
0416-969-308. |
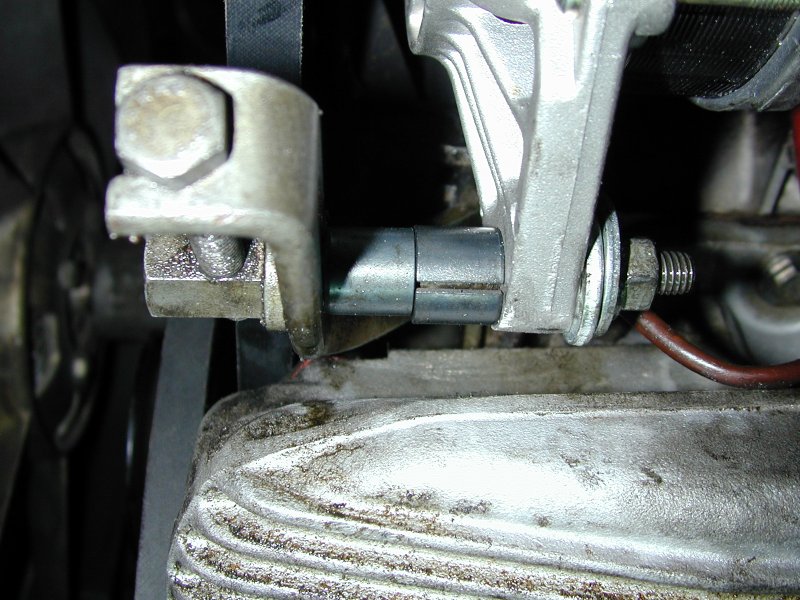 |
301 Another view of the bolt, shim, hollow rod and
washer assembly semi mounted onto the alternator, before final adjustments are made. |
 |
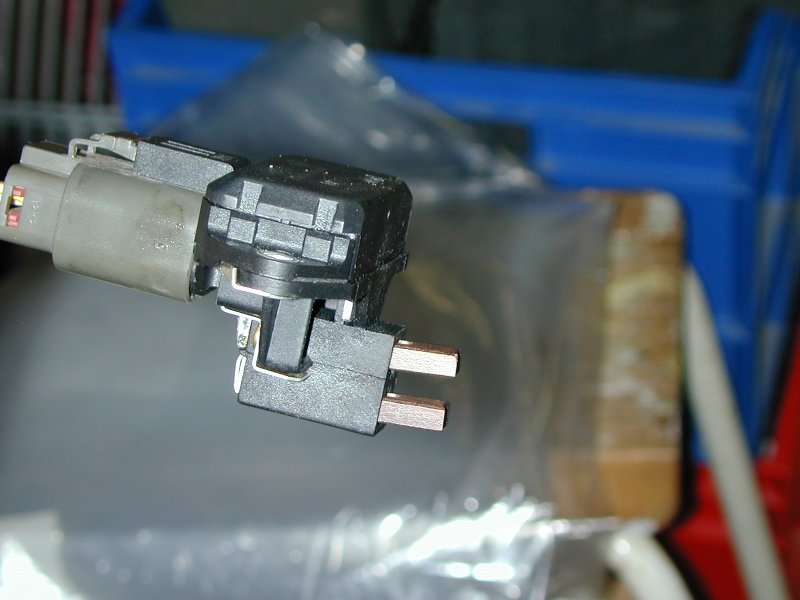
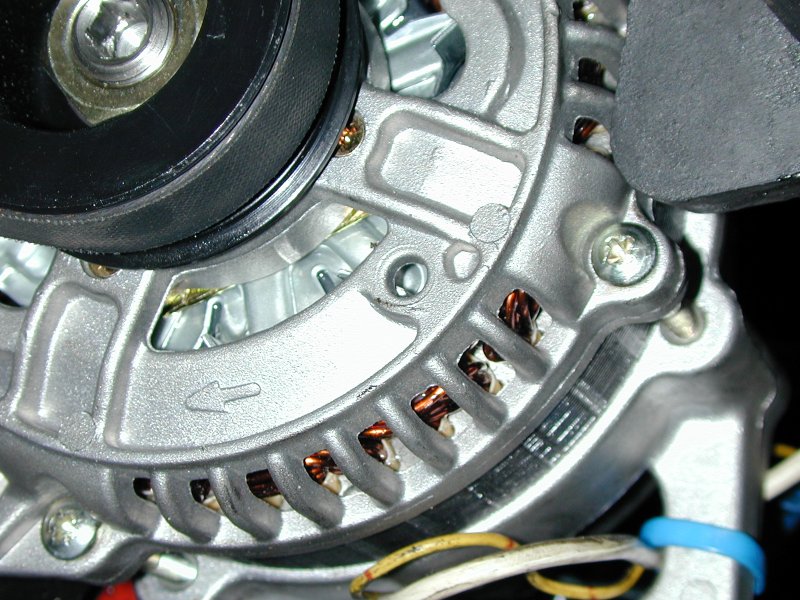
304 A close up view of the Bosch Alternators voltage and current regulator
and the field brushes. I spent some time investigating the internal
regulators components. They are all SMD (Surface Mounted) mounted on a
double 4 layer PCB. For the replacement cost ($30 odd) verses the Paris
Rhome regulator ($110 odd) its a great place of electronic engineering
work. |
 |
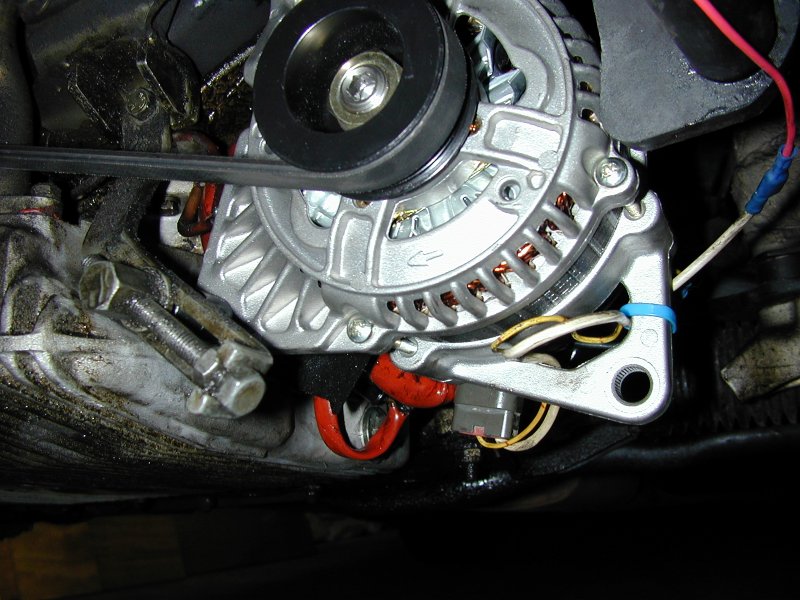
306 Final wiring up of the alternator to ignition coil (via the coil
resistors) on one side, master ignition switch, and the main battery
terminals. All nicely cable tied. |
 |
307 A different and better view of the power and regulator cabling. It is
different to the original Paris Rhome circuits, so additional connections
are required. |
 |
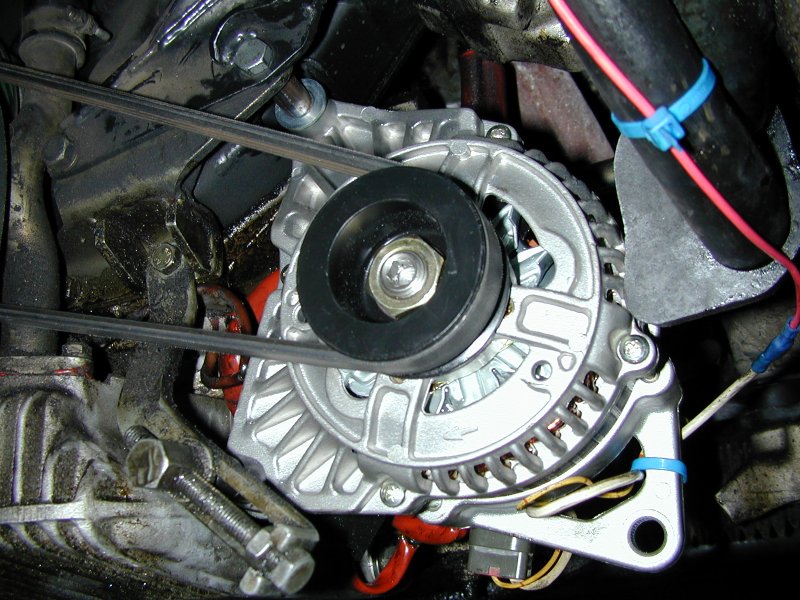
308 Final setup of new Alternator Belt (2 sizes bigger than the
original belt). Triple checking of engine / Alternator clearance, wiring harness
and cable connections before "turn on". |
 |
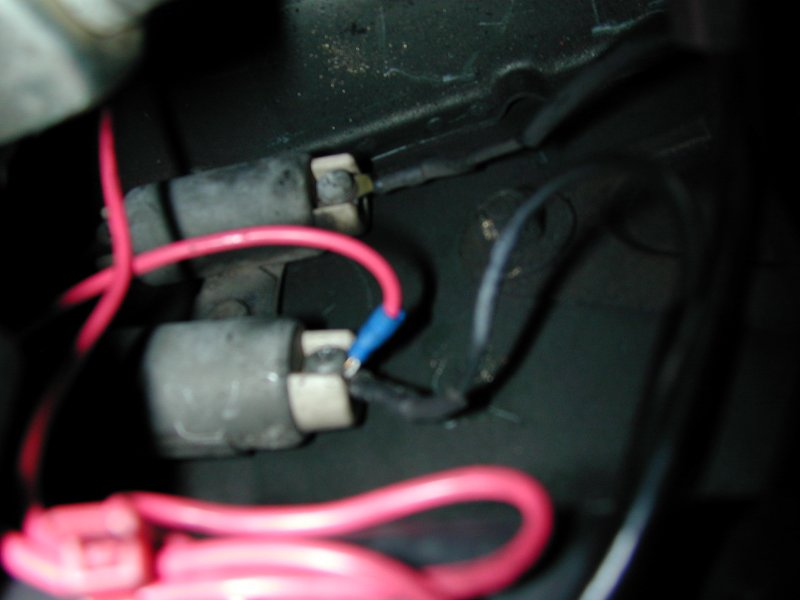
310 The wiring is connected to the coil resistors to maintain a short and
reliable connection. On 928's with different types of coils resistors or those with dual distributors, another cabling scheme will have to
be nutted out. |
 |
Grahame Kelly, Slate Blue '83 928 S Manual. Voip: 02-8815-7066

